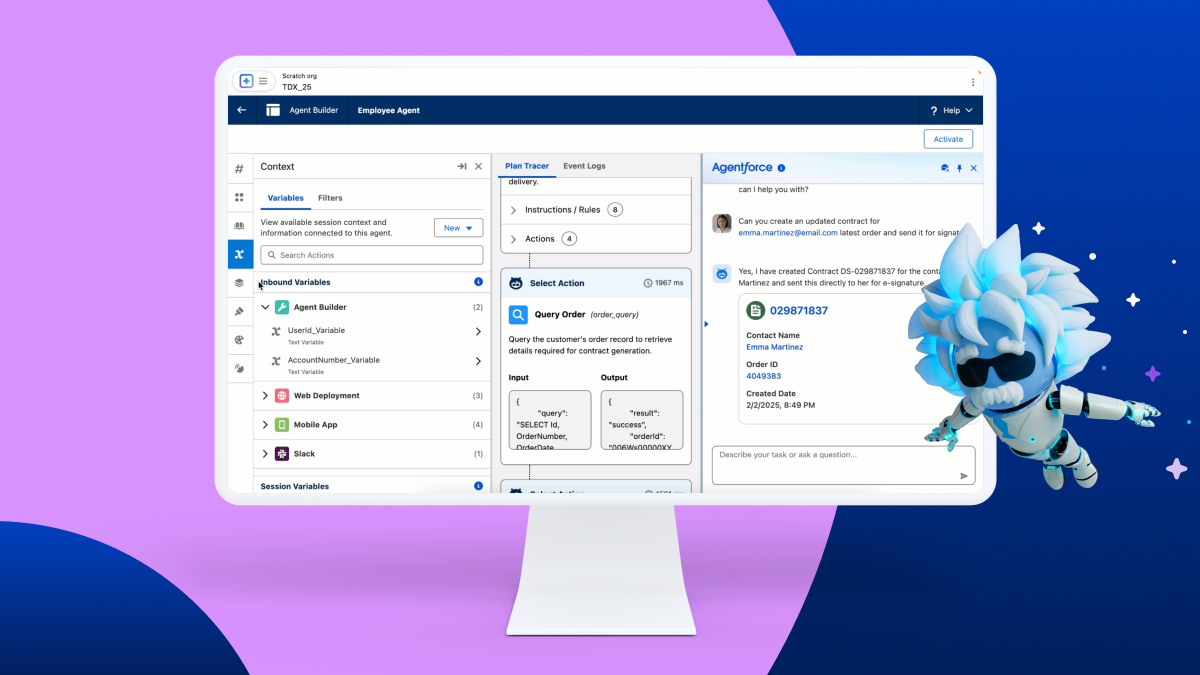
Supercharge Your Service Console: Creating an Agentforce-Enabled Scratch Org

Supercharge Your Service Console: Creating an Agentforce-Enabled Scratch Org

Ready to dive into the powerful world of Salesforce Service Cloud and its agent productivity tools? Want a clean, isolated environment to experiment with features like Omni-Channel, Service Cloud Voice, and more? Then you’ll need an Agentforce-enabled scratch org!

For those unfamiliar, a scratch org is a temporary, disposable Salesforce environment that you can quickly spin up for development, testing, and experimentation. Enabling the “Agentforce” feature within a scratch org unlocks a suite of functionalities designed to empower your service agents.

So, how do you create one of these magical environments? It’s simpler than you might think! Here’s your step-by-step guide:

Prerequisites:

  • Salesforce CLI (Command Line Interface) installed and configured: If you haven’t already, head over to the Salesforce Developer documentation and get the CLI set up. It’s your key to interacting with Salesforce DX.
  • Dev Hub enabled in your production org: Your Dev Hub is the central org you use to create and manage scratch orgs. Make sure it’s enabled.
  • Salesforce DX project: You should have an existing Salesforce DX project. If not, you can easily create one using the CLI command: sfdx force:project:create --projectname MyServiceProject

Steps to Create Your Agentforce-Enabled Scratch Org:

  1. Define Your Scratch Org Configuration File: This file, typically named project-scratch-def.json in your project’s config directory, tells Salesforce what features and settings you want in your scratch org. To enable Agentforce, you need to include the ServiceCloudVoice and Agentforce features.Open your project-scratch-def.json file (or create one if it doesn’t exist) and add the following:

JSON

{
“orgName”: “My Agentforce Scratch Org”,
“edition”: “Enterprise”,
“features”: [“ServiceCloudVoice”, “Agentforce”],
“settings”: {
“lightningExperienceSettings”: {
“enableS1DesktopEnabled”: true
},
“omniChannelSettings”: {
“enableOmniChannel”: true
}
// Add any other settings you need here
}
}

  • orgName: Give your scratch org a descriptive name.
  • edition: Enterprise Edition is generally recommended for Service Cloud features.
  • features: This is the crucial part! Including "ServiceCloudVoice" automatically pulls in the necessary dependencies for Agentforce.
  • settings: Here, we’ve enabled Lightning Experience and Omni-Channel, which are often used in conjunction with Agentforce. You can customize this section further based on your specific needs.

2. Create the Scratch Org Using the CLI: Now that you’ve defined your configuration, it’s time to bring your scratch org to life using the Salesforce CLI. Open your terminal or command prompt, navigate to your Salesforce DX project directory, and run the following command:

Bash :

sfdx force:org:create -f config/project-scratch-def.json -s -d 30

  • sfdx force:org:create: This is the command to create a new scratch org.
  • -f config/project-scratch-def.json: This specifies the configuration file you just created. Adjust the path if your file is located elsewhere.
  • -s: This sets the newly created scratch org as your default org, making it easier to deploy and interact with.
  • -d 30: This sets the duration of the scratch org to 30 days (the maximum). You can adjust this as needed.

3. Authorize Your Dev Hub (If Prompted): If this is your first time creating a scratch org or if your Dev Hub authorization has expired, the CLI will prompt you to authorize it by opening a web browser. Follow the on-screen instructions to log in to your Dev Hub org.

4. Wait for Your Scratch Org to Be Created: Salesforce will now work its magic and provision your new scratch org. This process might take a few minutes. Keep an eye on your terminal for confirmation messages.

5. Open Your New Scratch Org: Once the scratch org is successfully created, you can open it directly from the CLI using the following command:

Bash :

sfdx force:org:open

This will open your new Agentforce-enabled scratch org in your default web browser.

Next Steps:

Congratulations! You now have a fresh scratch org ready for you to explore the power of Agentforce. Here are some things you can do next:

  • Explore Service Cloud Setup: Navigate to Setup and explore the Service Cloud features.
  • Set up Omni-Channel: Configure routing rules, queues, and presence statuses.
  • Investigate Service Cloud Voice: If you have the necessary licenses, start setting up your call center.
  • Deploy Metadata: If you have existing Service Cloud configurations, use the CLI to deploy them to your new scratch org.
  • Develop and Test: Build and test your custom Service Cloud solutions in this isolated environment.

Creating an Salesforce Agentforce-enabled scratch org is a fantastic way to get hands-on experience with Salesforce’s robust service agent tools without impacting your production environment. So go ahead, spin up a new org, and unlock the full potential of your Service Cloud! Happy developing!


Salesforce Security Best Practices: Protecting Your Data

Salesforce Security Best Practices: Protecting Your Data

In today’s digital landscape, data is the lifeblood of any business, and safeguarding it is paramount. For organizations leveraging Salesforce, robust security measures are not just a best practice, they’re a necessity. A data breach can have devastating consequences, from financial losses and reputational damage to legal repercussions. This blog post outlines key Salesforce security best practices to help you protect your valuable data and maintain a secure environment.

1. Strong Passwords and Multi-Factor Authentication (MFA):

This might seem basic, but it’s the foundation of any security strategy. Enforce strong, unique passwords for all users and, crucially, implement Multi-Factor Authentication (MFA). MFA adds an extra layer of security by requiring users to verify their identity using multiple factors, 1 such as a code sent to their phone or a biometric scan. This significantly reduces the risk of unauthorized access, even if a password is compromised.   

2. Principle of Least Privilege:

Grant users only the minimum necessary access rights they need to perform their job functions. Avoid assigning overly broad permissions. Regularly review user permissions and revoke access when it’s no longer required. This principle limits the potential damage if an account is compromised. Salesforce’s role hierarchy and permission sets are crucial tools for implementing this principle.

3. Regular Security Audits and Monitoring:

Conduct regular security audits to identify vulnerabilities and weaknesses in your Salesforce setup. Utilize Salesforce’s built-in security health check and consider third-party security assessment tools. Implement real-time monitoring to detect suspicious activity and potential threats. This proactive approach allows you to address issues before they escalate.

4. Data Encryption:

Encrypting your data, both in transit and at rest, is essential for protecting it from unauthorized access. Salesforce offers encryption features, and you should leverage them to secure sensitive information. Consider using platform encryption for data at rest and ensure that data in transit is protected using HTTPS.

5. Secure Session Management:

Implement appropriate session management controls, such as session timeouts and IP restrictions. Session timeouts automatically log users out after a period of inactivity, reducing the window of opportunity for unauthorized access. IP restrictions limit access to Salesforce from specific IP addresses, further enhancing security.

6. Regular Data Backups and Recovery:

Regularly back up your Salesforce data to ensure you can recover it in the event of a data loss or disaster. Test your recovery process to ensure it works effectively. Having a reliable backup and recovery plan is crucial for business continuity.

7. Secure Integrations:

When integrating Salesforce with other applications, ensure that the integrations are secure. Use secure protocols and authentication methods. Regularly review and monitor the security of your integrations.

8. User Training and Awareness:

Educate your users about security best practices. Train them on how to identify phishing scams, recognize suspicious emails, and protect their passwords. A well-informed user base is your first line of defense against many security threats.

9. Stay Updated:

Keep your Salesforce instance and all related applications up to date with the latest security patches and updates. These updates often address critical security vulnerabilities.

10. Leverage Salesforce’s Security Features:

Salesforce offers a wide range of built-in security features, such as:

  • Sharing Rules: Control how records are shared within your organization.
  • Validation Rules: Enforce data quality and prevent invalid data from being entered.
  • Workflow Rules and Process Builder: Automate security-related tasks, such as alerting administrators to suspicious activity.
  • Event Monitoring: Gain insights into user activity and identify potential security threats.

Conclusion:

Security is an ongoing process, not a one-time task. By implementing these Salesforce security best practices, you can significantly reduce the risk of data breaches and protect your valuable information. Regularly review and update your security measures to stay ahead of evolving threats. A proactive and comprehensive approach to security is essential for maintaining a secure Salesforce environment and ensuring the long-term success of your business.

If you are looking for Salesforce Consultant in India , feel free to contact us .

Step-by-Step Guide to Integrating Salesforce Data Cloud with Snowflake

Step-by-Step Guide to Integrating Salesforce Data Cloud with Snowflake

In today’s data-driven world, businesses need seamless integration between their CRM and data warehousing platforms to unlock the full potential of customer insights. Salesforce Data Cloud enables companies to unify and activate customer data, while Snowflake provides a powerful platform for storing and analyzing vast amounts of structured and semi-structured data. Integrating these two platforms ensures that organizations can leverage real-time customer intelligence for better decision-making.

For companies looking for expert guidance, hiring a Salesforce consultant in India can simplify the integration process. Here’s a step-by-step guide to integrating Salesforce Data Cloud with Snowflake effectively.

Step 1: Set Up Your Salesforce Data Cloud Account

Before starting the integration, ensure that you have access to Salesforce Data Cloud and appropriate permissions to configure data sharing.

  1. Log in to Salesforce Data Cloud.
  2. Navigate to Data Streams and ensure that you have relevant data sources connected.
  3. Set up data permissions to allow external sharing with Snowflake.

Step 2: Enable Data Sharing in Snowflake

To integrate with Salesforce Data Cloud, Snowflake must have a database configured to receive shared data.

  1. Log in to Snowflake.
  2. Create a dedicated database for Salesforce data:CREATE DATABASE salesforce_data_cloud;
  3. Set up a schema and warehouse to manage data ingestion efficiently.

Step 3: Establish the Data Cloud-Snowflake Connection

Salesforce Data Cloud supports direct connectivity to Snowflake using Secure Data Sharing.

  1. In Salesforce Data Cloud, navigate to Data Sharing settings.
  2. Choose Snowflake as your target platform.
  3. Enter Snowflake connection details, including:
    • Account Name
    • Warehouse
    • Database Name
    • Authentication Credentials
  4. Grant Salesforce access to write data into Snowflake.

Step 4: Configure Data Mapping and Transformation

Once connected, it’s crucial to map Salesforce Data Cloud objects to Snowflake tables.

  1. Identify key objects (e.g., Leads, Contacts, Opportunities).
  2. Set up a Dataflow in Salesforce to ensure data transformation.
  3. Use SQL transformations in Snowflake to structure the data for analysis.

Example:

CREATE TABLE transformed_contacts AS
SELECT id, name, email, phone FROM salesforce_data_cloud.contacts;

Step 5: Automate Data Sync and Monitor Performance

To maintain an up-to-date data pipeline, implement automation and monitoring.

  1. Use Salesforce Data Cloud’s scheduled data sync.
  2. Leverage Snowflake’s automated ingestion pipelines using Snowpipe.
  3. Monitor logs and performance to ensure data consistency.

Step 6: Analyze and Utilize Integrated Data

With Salesforce data now in Snowflake, businesses can perform advanced analytics.

  • Run AI-driven customer segmentation.
  • Use BI tools like Tableau or Power BI for visualization.
  • Implement predictive analytics models for improved decision-making.

Why Hire a Salesforce Consulting Firm in India?

For businesses looking to streamline their Salesforce-Snowflake integration, hiring a Salesforce consulting firm in Indiacan be highly beneficial. Experts can:

  • Optimize data pipelines for efficiency.
  • Ensure compliance and data security.
  • Provide real-time support for troubleshooting.

Final Thoughts

Integrating Salesforce Data Cloud with Snowflake unlocks significant value by enabling real-time insights and advanced analytics. By following these steps, businesses can ensure a smooth and efficient data integration process. Seeking the help of a Salesforce consultant in India can further enhance the process, making it seamless and more effective.

Need expert Salesforce integration services? Contact a Salesforce consulting firm in India today to get started!